

Redefining Your Hashnode Experience With HashBot
Escape the "noise" of blogging on Hashnode in a private space


✒️ Introduction
So, you have a blog on DEV.to or Medium & you're looking to tap in to Hashnode's organic community. You've tried copying the content of your posts, copying each setting for the post and tried to find the equivalent on Hashnode. You ruffle your hair one or two times in frustration & end up giving up after the first 2 drafts. You wish there were an easier & intuitive way to handle this. Oh, this is not you?
Let me try another one: You're a seasoned member of the Hashnode community. You have a couple of posts. You notice something is missing while viewing your drafts or posts – you feel some "noise." Like you're doing something in public that'd you'd rather do in private. You wish you could do all that away from the "noise." Well, that's what Hashnode Pro's Zen mode is for, kinda. But what if you're not ready to get the pro plan yet? I think I have something for you.
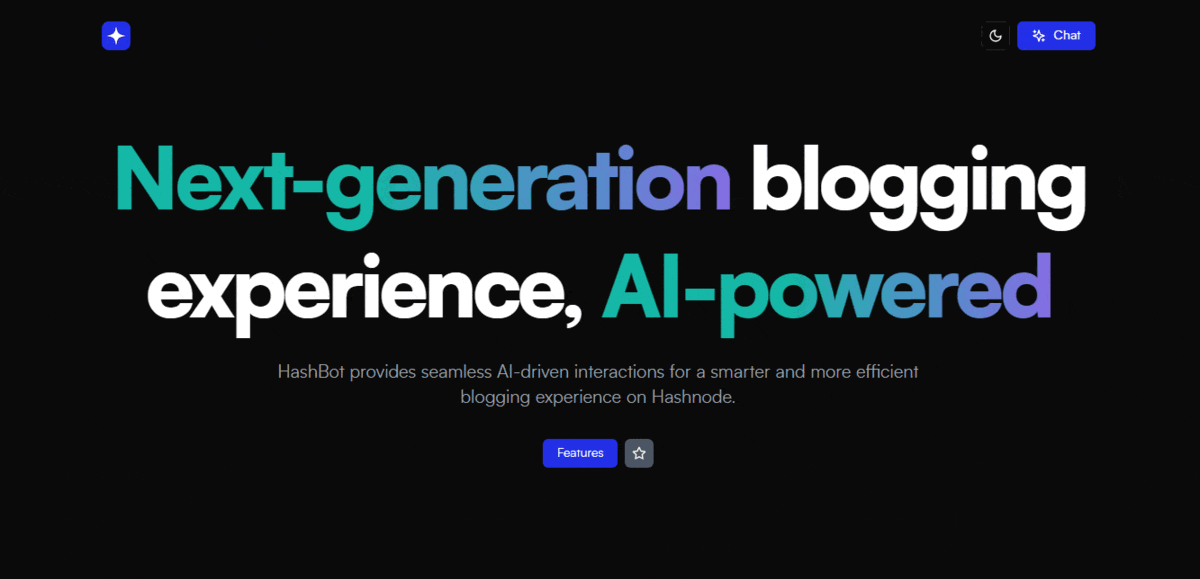
I'm thrilled to introduce you to HashBot, a project designed to reimagine your Hashnode experience. In this article, I'll walk you through the journey of creating HashBot, showcasing its features, challenges faced, and the exciting roadmap ahead.
📑 Project Description
HashBot uses a Hashnode Personal Authentication Token (PAT) for verifying user identity. This means that it doesn't store any data about users. All storage is done on the user's browser.
At the heart of HashBot is an AI chat feature. With it, you can communicate with & perform actions on your Hashnode account. Crazy right? Of course, yes. While it's currently on a brief hiatus (because I'm out of OpenAI credits & my Dollar Mastercard chose the best time to be out of service), the UI is all set, promising an interactive dialogue experience.
But that's not all – HashBot goes beyond conversation. Our Post Import feature lets you effortlessly bring your content from platforms like DEV.to and Medium into one central hub. It also allows you navigate through your Posts & Drafts page with our infinite scroll. Your posts get a slick modal to share your post to various platforms.
⌘ + K? We got it! HashBot is entirely navigable using your keyboard! How cool is that? You should give it a try. It's too awesome to explain. You'll love it 😉. You also get to change your theme from dark mode to light mode, even though dark mode rules (light mode peeps, I see you 👀).
🛠️ Tech Stack
FrontEnd: TypeScript, Next.js
BackEnd: Next.js API Routes, Hashnode GraphQL API
Authentication: Hashnode Personal Access Token
Styling: Tailwind CSS & ShadCN components
As you may have noticed, I don't use any database or cloud provider to store any user information. Hashnode's GraphQL API is my ONLY source of truth. The funny thing about this is that I dislike GraphQL 😪. Really. I tried escaping it by using Hasura to create a REST API that makes a request to Hashnode's GraphQL. It was a hassle figuring how to do that. Thankfully, it didn't work out. That'll be a roundabout way of doing stuff. I eventually resigned myself & checked out Hashnode's Starter Kit. Their usage of GraphQL really put things in perspective for me. I can't believe I'd ever say this but I'm starting to like GraphQL ;).
🔒 The Next.js Middleware
As I said earlier, we authenticate a user using their Hashnode Personal Access Token (PAT). One approach to do that is doing it from the client on every page load. I know, I know, that sucks, for a WHOLE lot of valid reasons. Thankfully, I'm using a "cool kids" full stack framework. I decided to work on a custom Next.js middleware (basically, a piece of code that runs EVERY damn time a request is made to our app) for authentication with Hashnode.
Here's the code:
import { NextRequest, NextResponse } from 'next/server';

export const middleware = async (request: NextRequest) => {
  const publicRoutes = ['/sign-in'];
  const excludePattern = /^\/(?!api\/public|_next\/static|_next\/image|images|favicon.ico).*/;

  if (!excludePattern.test(request.nextUrl.pathname)) {
    return NextResponse.next();
  }

  const isRootRoute = request.nextUrl.pathname === '/';
  const token = request.cookies.get('token')?.value;

  if (isRootRoute || publicRoutes.includes(request.nextUrl.pathname)) {
    return NextResponse.next();
  }

  if (!token) {
    const url = request.nextUrl.clone();
    url.searchParams.set('next', url.pathname);
    url.pathname = '/sign-in';
    return NextResponse.redirect(url);
  }

  // Verify token...
  const authResponse = await fetch(`${request.nextUrl.protocol}//${request.nextUrl.host}/api/public/validateToken?token=${token}`);

  if (!authResponse.ok) {
    const url = request.nextUrl.clone();
    url.searchParams.set('next', url.pathname);
    url.pathname = '/sign-in';
    return NextResponse.redirect(url);
  }

  return NextResponse.next();
}
Here's a rundown of what it does:
It defines a list of public routes & exclude patterns.
It checks if the current request path is included in the exclude pattern (lol) & skips the rest of code if true.
It then checks if the current request path is the homepage or part of the public routes.
It then checks if there's a token. If there's no none, it takes you to the sign in page.
If there's a token, it tries verifying the token. If it wasn't successful, you get taken to the sign in page.
If not, it means you're an OG and your request can proceed in peace.
This sounds like a whole lot, right? It does in writing but it's blazingly fast in execution.
⏬ The Import Feature
Currently, we support only two import sources: DEV.to & Medium. DEV.to has an easy-to-understand API for fetching articles & Medium has an RSS feed feature. I decided to create 2 different API routes to handle them. Combining them would still work; it's just a preference.
Here's a breakdown of the API route handling DEV.to imports:
The token, username & publicationId are set. The token & publicationId are gotten from the cookie because the API route for validating user token sets that. Pretty cool right? If the username of the account the user wants to import from is not passed in, an error is returned.
 const token = req.cookies.get('token')?.value || req.nextUrl.searchParams.get('token');
 const username = req.nextUrl.searchParams.get('username');
 const publicationId = req.cookies.get('publicationId')!.value;

 if (!username) {
   return NextResponse.json({ message: 'DEV.to username not provided!' }, { status: 400 });
 }
Here we fetch the article details for the user before fetching each individual article. If the no article was found, we return a response.
 const startTime = Date.now();
 const articlesResponse = await fetch(`https://dev.to/api/articles?username=${username}`);
 const articlesData = await articlesResponse.json() as { id: number; [key: string]: any }[];

 if (articlesData.length === 0) {
   return NextResponse.json({ message: 'No post found!', data: { count: 0, duration: 0 } }, { status: 200 });
 }

 const articlePromises = articlesData.map(({ id }) => fetch(`https://dev.to/api/articles/${id}`).then(res => res.json()));
 const articleResponses = await Promise.all(articlePromises) as DevToArticle[];
Up next, we make a request to publish the posts on Hashnode through their GraphQL API. We choose some sensible defaults here. In the future, I'd love to make this configurable.
 const hashnodePostPromises = articleResponses.map(article = >{
   const tags = article.tags.map(tag = >({
     name: tag,
     slug: tag
   }));

   return fetch(GQL_ENDPOINT, {
     method: 'POST',
     headers: {
       'Content-Type': 'application/json',
       Authorization: `$ {
         token
       }`
     },
     body: JSON.stringify({
       query: `mutation PublishPost($input: PublishPostInput ! ) {
         publishPost(input: $input) {
           post {
             url
             tags {
               name slug
             }
             coverImage {
               url
             }
             author {
               name profilePicture username
             }
           }
         }
       }`,
       variables: {
         input: {
           tags,
           publicationId,
           title: article.title,
           subtitle: '',
           slug: article.slug,
           contentMarkdown: article.body_markdown,
           coverImageOptions: {
             coverImageURL: article.cover_image
           },
           disableComments: false,
           originalArticleURL: article.url,
           publishedAt: article.published_at,
           metaTags: {
             description: article.description,
             image: article.social_image,
             title: article.title
           },
           settings: {
             delisted: false,
             enableTableOfContent: true,
             isNewsletterActivated: false,
             slugOverridden: true
           },
         },
       },
     }),
   }).then(response = >response.json());
 });

 const hashnodePostResponses = await Promise.all(hashnodePostPromises) as { data: PublishPostMutation, errors?: { message: string }[] }[];
Lastly, we then check if there are errors. If there are none, we return a success response.
 // Extract unique error messages
 const errorMessages = Array.from(new Set(hashnodePostResponses.flatMap(response => response.errors?.map(error => error.message)).filter(Boolean)));
 if (errorMessages.length > 0) {
     console.log('Error Messages :>>', errorMessages);
     return NextResponse.json({ message: 'Import failed!', errors: errorMessages }, { status: 500 });
 }

 const data = {
     count: articleResponses.length,
     duration: Date.now() - startTime
 }

 return NextResponse.json({ message: 'Import successful!', data }, { status: 200 });
The Medium importer has a very similar structure. The main difference is that we're converting the RSS to JSON using the RSS2JSON API.
💪 Challenges Faced
Like I mentioned earlier, I really disliked GraphQL. If there was a REST API alternative, I would have chosen it a thousand times over. Since I didn't have that option, I began learning up. Hashnode's Starter Kit was super helpful 🙌🏽. Hasura's GraphQL explorer & Hashnode's API docs were also very useful. Without them, I would most likely not make this post ;(. I now appreciate GraphQL & I'm looking forward to doing more stuff with it.
My free OpenAI credits expired, and it really affected the direction of my project. My initial project idea was just the AI chatbot feature. I had to come up with more features to add to HashBot pending when I get more OpenAI credits.
After I came up with more features to work on, I had to double up to be able to meet up with the deadline. Unfortunately, I took ill during that period. I was this close to quitting my HashBot project 😪. Thankfully, I pressed on and submitted 2 hours to the deadline! Talk about a close call 💀.
I'm a sucker for good UI. I can't work on a project with a shabby UI because I'll end up losing interest. Since I didn't have a designer, I had to come up with how the UI would look myself. This ended up taking more time than I thought it would. I used v0 to come up the base structure I used for my post and draft cards. I also used TailwindComponents.com to get inspiration for the post share modal.
CACHING! Yes, caching. Hashnode setup caching for both Hashnode.com & the GraphQL API. This made me refresh and refresh and refresh and refresh anytime I made a request. I didn't see any place where the cache duration was mentioned. I'd be really awesome if they add a caching field for developers to control (or disable) it when needed 🥺.
💻 Code Repository
Link: https://github.com/omzi/hashbot
🔗 Project Link
Link: https://hashbot-v0.vercel.app
⚗️ Test Credentials
I created a test Hashnode account (HashBot). Here's the token for it:
69a70bc5-003f-482c-bc74-b9d82068e236
I can't guarantee that the token will stay valid for long. If you try it & it doesn't work, please visit your Hashnode developer settings to get your token.
📸 Screenshots
📽️ Presentation Video
✨ Conclusion
Whew! That was a long one, right? Thanks for making it this far! This is my first time of writing such a long post. Feel free to give HashBot a try & let me know in the comment section below. I'm working on improving HashBot & completing the AI chatbot feature (really pumped to see how it'd turn out 😎).

I'm grateful to Hashnode for organizing this hackathon. I learnt a LOT of new stuff while working on HashBot 😁. I'm also grateful to Osada Vidath. His post style is really good, and I picked up a thing or two from it.
Have any constructive feedback for me? I’d love to know in the comments section below or via a Twitter DM (I’d prefer this). Connect with me on Twitter (@0xOmzi).
Mata ne ✌️